Things to know about this Norway spruce kit
NORWAY SPRUCE (Picea abies)
NORWAY SPRUCE (Picea abies)
It is a species of the coniferous order, which can grow up to 50 m tall and have diameter of up to 1-1.5 m, with a pyramidal-conical, evergreen crown and asymmetrical, dark green leaves.
The roots are shallow, trailing, which makes this species vulnerable to wind. The stem is straight, cylindrical.
The cones, cylindrical in shape, are pendulous and show different colors: green, purple and brownish when mature. The scales of the cones each contain two winged seeds. At late autumn, the scales open to facilitate the flight of the wind-borne seeds. Grows to altitudes between 550-1850 m.
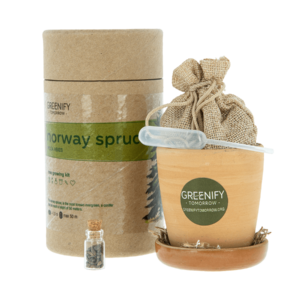
Cylindrical cardboard packaging, reusable in the household as a container for various objects, as a “piggy bank”, or as a support for writing instruments on the desk. Being made of cardboard, it is not resistant to moisture and can swell, therefore it can be damaged. The cylinder is recyclable, and by reuse you protect NATURE.
Clay pot. Burnt clay is a brittle material. Be careful not to drop it, as it can break very easily. Although the kit encourages you to work with children, please be careful so they do no not get harmed with any shards resulting in the unfortunate event that the pot breaks. Don’t worry, if the pot is broken, you can continue the project with any other container, provided it is about the same size and has a small excess drain hole at the base.
Sack with soil. The soil is a mixture of peat and compost. Both components are vegetal in nature. It does not contain additives or synthetic chemicals. It is not edible. The sack is reusable after a previous wash.
Pipette. We considered it necessary for a controlled dosage of the amount of water. It is the only plastic object. Please reuse it after completing this project for other purposes. If you still decide to throw it away, please do it selectively, with plastic waste, to be recycled.
Seed bottle. We chose to use the bottle as a container for the seeds because they are perishable. Like the clay pot, the bottle is brittle. It can break, and shards can cause cut wounds. You can reuse it or throw it away selectively.
Seeds of Norway spruce (Picea abies – scientific name). They come from cones harvested in the Curbura
Carpathians – Brasov Depression – in the year 2020, from an altitude of 1100 m. The percentage
of germination of the batch of seeds is 54.5%, which means that statistically, every second seed has the probability of sprouting and giving life a tree. The seeds of this species are not edible, but ingesting them will not require medical intervention. They are not treated with chemicals, touching them with the free hand do not cause allergies. If not used immediately after purchase, the seeds should be stored at refrigerated between 3-10 ̊C. This will preserve their germination power for 1-2 years.
1. What happens if the seeds reach too deep into the soil?
If the seeds reach too deep, they risk not being able to penetrate the soil layer and will perish before sprouting.
2. What happens if the seeds become too shallow?
If the seeds become too shallow, they will germinate very quickly, the plant not having enough time to form a suitable root, so the seedlings will overturn.
3. Too little water?
If it receives too little water, it will wither. At this early age, a wilted plant can rarely be restored to its original state.
If it is considered that the water added according to the guide is too little, it is up to you to adjust the quantity. In these growth stages, the plants are very sensitive to deficit of water.
4. Too much water?
If it has too much water, it risks rotting.
If it is considered that the water added according to the guide is too little, it is up to you to adjust the quantity. In these growth stages, the plants are extremely sensitive to excess water.
5. What to do with the refrigerated seeds?
You can use any other container and flower soil to grow a new generation of seedlings. They will usually sprout more seeds, which will later become seedlings. It is not desirable to separate them at this early age. They will be able to separate at transplanting, but carefully, without shaking too much soil.
6. Should I use fertiliser?
You should not use fertiliser, artificial or natural fertilizers for as long as the seedlings are in the pot and in the soil in the kit.
What will you find in the Norway spruce Kit
What will you find in the Norway spruce Norway spruce kit


One pine, more pines
One tree makes a difference, a whole forest changes lives.
So, .
Day zero
STEP 1
Place the pot on a small plate. Open the bag of soil and fill the pot up to the black mark inside. Level the soil.
Open the cap of the seed bottle and sprinkle half of the seeds on the soil. Close the remaining seed bottle and store it in the fridge. The seeds stored in this way will be a backup in case of failure.
The seeds can be stored for several years in the sealed bottle. The germination rate will decrease by about 10% per year. Put the remaining soil over the seeds. Level the soil and gently tap it with your finger. Make sure that all the seeds are evenly covered.
Fill a glass with water and dose the water with a pipette until the excess water appears through the pot’s spout into the dish. This is the only time we recommend using more water. From here on, use two pipettes of water a day to water the seeds. If you try to water the pot with tap water or another container, you risk washing the soil off the seeds. If you forget to water, you can make up for it by putting extra drops of water.
Put the pot in a bright place, but away from heat sources.
Day 10 to 60
STEP 2
Seeds will sprout 10-20 days after being potted. Small sprouting gaps may occur, so don’t panic and don’t dig up the soil looking for seeds. By moving sprouted seeds, they will stop growing. If they have not sprouted after 30 days, the operation can be repeated with the spare seeds stored in the refrigerator.
A few days after the seeds have broken through the soil crust, they will start to grow, with the sheath upwards. This sheath will fall off by itself. Don’t touch the sheath, don’t try to remove it by hand because you will damage the first little leaves, called spruce needles. There are 6-8 of them and as soon as the sheath falls off, they will open like a rosette.
The plant will apparently stagnate for a long time at this stage.Don’t forget to water the pot every day with 2-3 drops of water.
This is the most critical period in the life of this tree. Some specimens will not survive this stage for genetic reasons, due to physical factors in excess or, conversely, due to a lack of them (e.g. too much or too little water). Some microscopic fungi, whose spores are pre-existing in the soil used, can also cause damage.
Day 60 to 365
STEP 3
From the second month the plant will grow in height.
After the second month you can stop watering the plant with the pipette because the soil will become so textured that watering from other containers is possible.
From the third month onwards, you no longer need to water daily, but you should check the soil and keep it moist at all times.
In the first year it will reach 5-12 cm in height.
Day 365 +
STEP 4
In the second year, it is desirable to move the plant to a larger 2-litre pot. You can use commercial flower potting soil, or soil from your own garden.
It tolerates most types of soil well. It prefers slightly acidic soils. It does not survive on sandy, salty and excessively wet soils.
When transplanting, do not shake the soil off the roots. From the second year it can be kept outdoors in a place out of the sun, but in winter it should be brought indoors so that the root does not freeze.
Keep watering the pot weekly.
In summer, the seedlings need water and shade.
In the third year, in spring, you can plant it ot its permanent spot. Choose a spot from where you won’t have to move it.
It can reach 30-50 m height.
Choose the spot so that it does not endanger the safety of surrounding buildings and make sure there are no pipes under the saplings.
The best time for transplanting is spring in April-May.